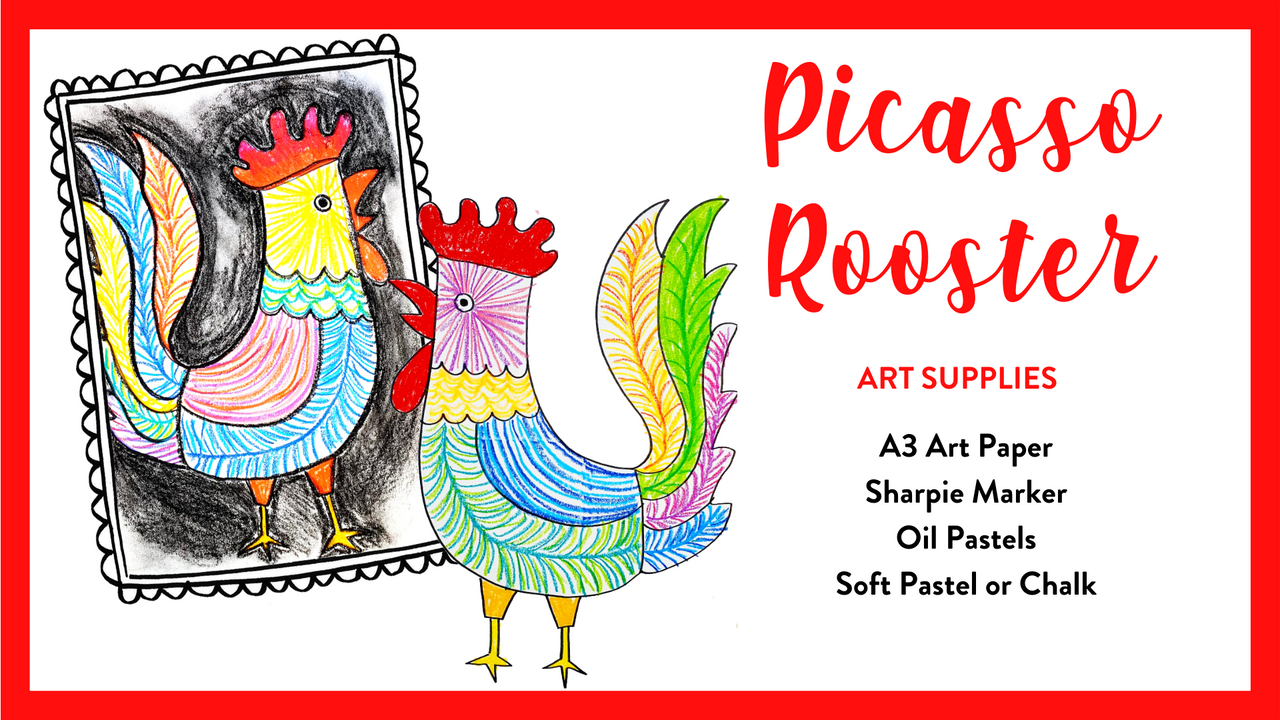
Draw like Pablo Picasso
Oct 22, 2022One thing I love about art is the side benefit of learning history and all about The Great Artists that have shaped so much of what we see and create today. It wouldn’t be an art education without touching on the famous painter; Pablo Picasso! Most Little Artists have heard of him and his abstract, crazy artworks of cubist style faces or the ‘Weeping Woman’. But many have never seen his painting of ‘The Roaster’ - 1938 (not ‘Rooster’!). Have you ever seen it?? I hadn’t until recently, and now I love the simple art lesson inspiration it has brought. I made this downloadable drawing guide to help you along with this lesson.
Picasso’s bold, colourful rooster drawing is the latest inspiration for a fun lesson inside the Art Club this week. In my last zoom art class of kids 5 -12 years old they ALL said this drawing was one of their favourite lessons. It’s a simple art lesson that focus’s on line and colour - each Little Artist had some beautiful results.
You can try the full length video lesson of Picasso’s Rooster inside my Art Club OR find it as part of a new Great Artist Art Bundle. Art projects inspired by Picasso, Salvador Dali, Frida Kahlo, Henri Matisse, Van Gogh and UK artist Clare Youngs all feature in my new Art Bundle! It’s been fun putting these projects together that teaching Little Artists about famous creatives and their iconic artworks, checkout their finished artworks and smiling faces.


PABLO PICASSO ROOSTER ART PROJECT
Download my Free Rooster Drawing Guide to go with this lesson. You can also have some fun drawing a Frida Kahlo portrait with another free famous Artist lesson over here.
Art Supplies:
-
A3 Art Paper
-
Sharpie Marker
-
Oil Pastels
-
Black Chalk

Step 1. Drawing the outline
Use a sharpie marker to draw a crest shape in the top right corner of your page, followed by an eye underneath. The body is made up of two ‘J’ lines. Draw a ‘J’ from the crest down the page and curving up for the belly. Draw a shorter ‘J’ for the other side of the rooster’s body. Then finish with a straght line to connect the two. Next draw a beak and a gobble.
Add a big sweeping tail from the body up towards the top left hand corner. Picasso drew his rooster’s tail with sharp, spikey edges. Add little rectangles for the rooster’s thighs and legs and feet.
Step 2. Sections
Separate your rooster into at least 6 sections by drawing wobbly, curved or straight lines.
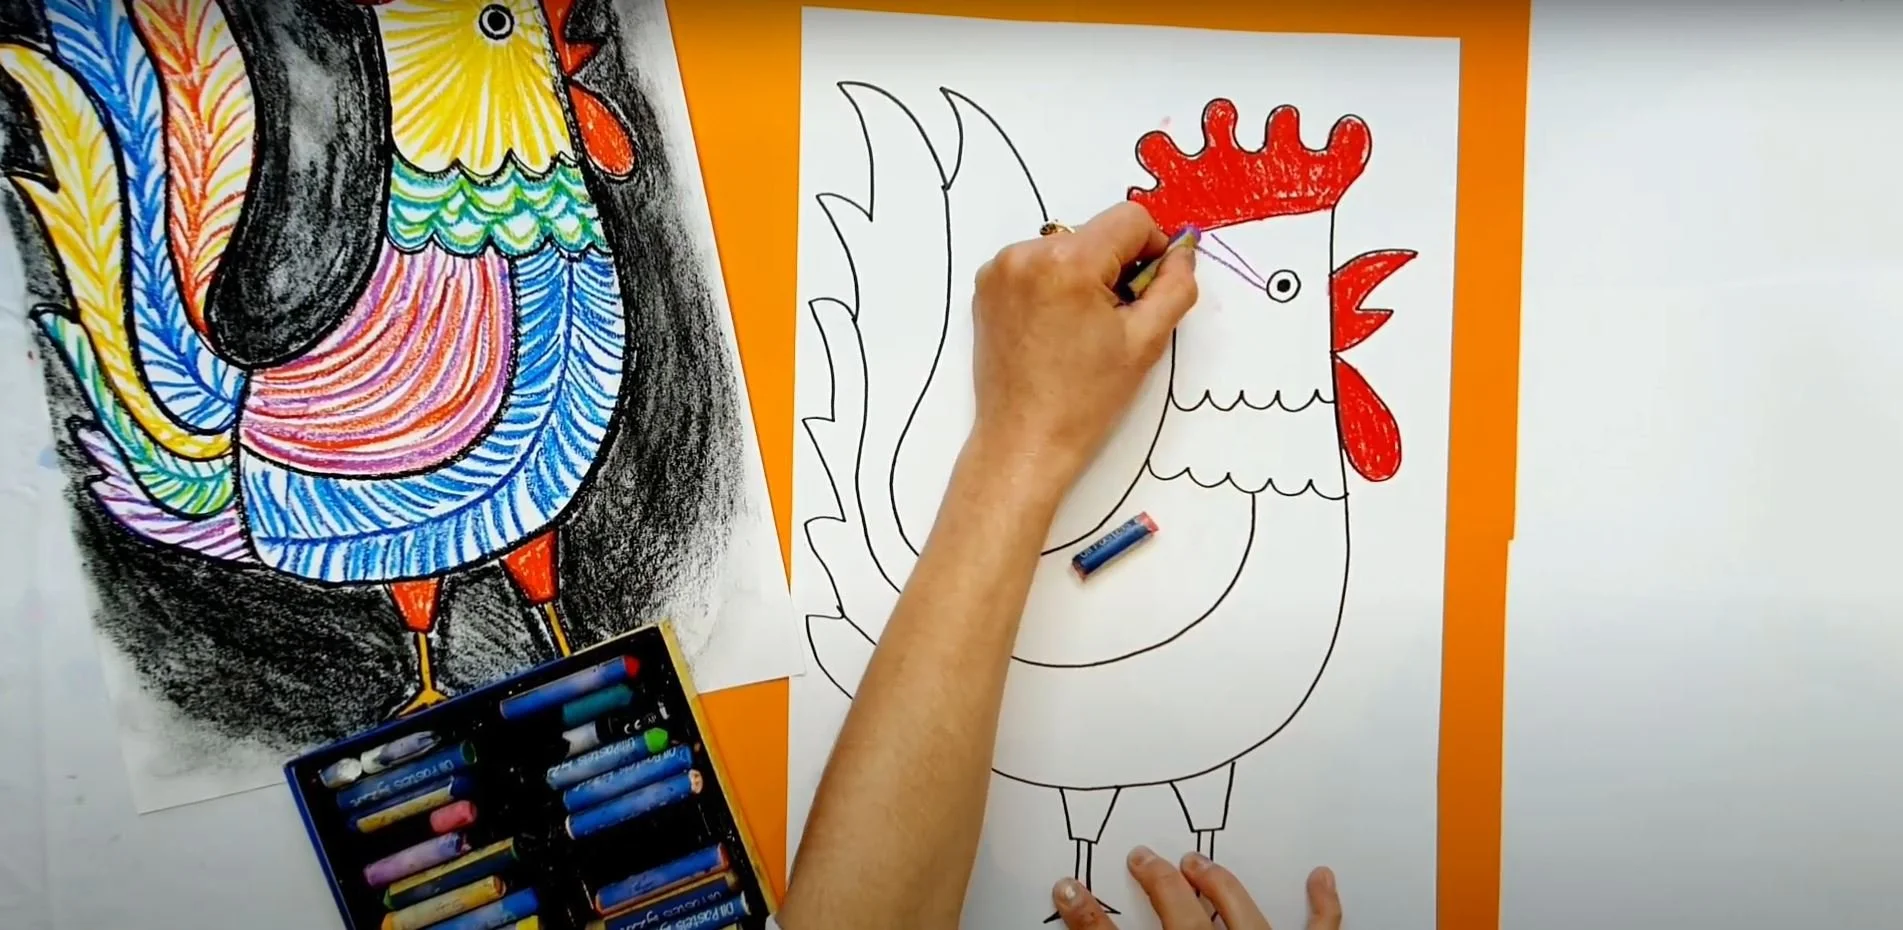
Step 3. Add Colour
Choose a bright, bold colour and add oil pastels to the beak, crest, gobble, feet and legs. Then select two colours (I like using light and dark harmonious colours) to fill each section of the rooster with line. You can fill the head with straight lines radiating out from the eye, curved lines for the tummy and wing, and wavy lines for the rooster’s neck. Drawing a line down the middle of each tail section and drawing little strokes either side is how I filled my rooster tail.
Step 4. Black Outlines
Draw over the top of sharpie marker outlines with a black oil pastel. This will help make your rooster stand out.

Step 5. Background
Use chalk to draw around your rooster and smudge with your finger. If you don’t have chalk, creating a watercolour background blend works well too!